
 For those of you that don't know me, I'm a big fan of automation. With the ever-growing importance of social media, having plenty of social shares and likes can only improve your marketing campaign. You have heard me talk a lot about a tool called mass planner which is an amazing tool that automates all of your social media accounts 24/7. Jarvee is another one of these tools and is actually very similar to Massplanner. It supports multiple social media platforms and lets you automate nearly every aspect of your account.
Pricing
Before you consider buying it the first thing you need to know is this is a windows based platform, if you're using a mac it is still possible for you to access it, however you will need a windows based VPS. Now you know that we can take a look at the different prices.
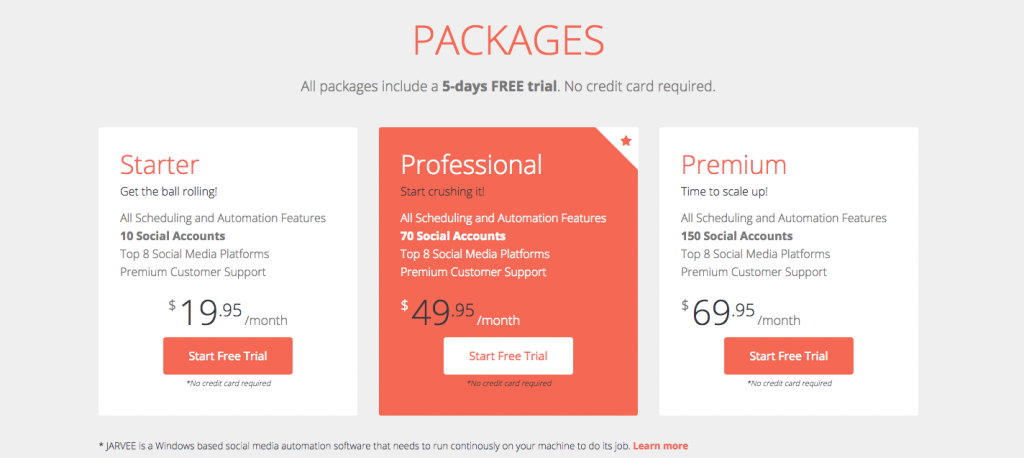 Jarvee has 3 different price options, the difference being the number of accounts that you can automate. Regardless of which account you choose there is a 5 day free trial that doesn't require any card details. So before you choose, have a think about the number of accounts that you can add in those 5 days and go with that option. The most basic starter package will cost you %19.95 per month which holds up to 10 social accounts, while the more expensive premium package that holds 150 will cost you $69.95 a month. All of these accounts come with full customer support and will work with all the platforms that Jarvee can run automation on. Once you sign up you will be logged into your account where you can download the software onto your desktop. Jarvee will also send you an email with a password for your account (If you don't see it, check your spam folder as it came through here for me).
Proxies
When you install the software and login you will see just how similar the interface is to Mass Planner. Before setting up any of the profiles however, you will want to put in all of your proxies.
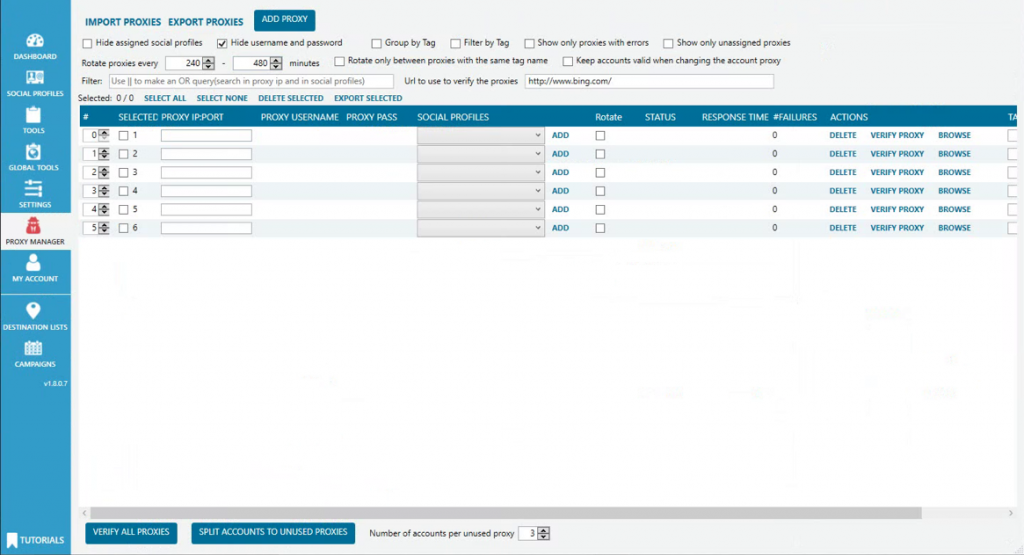 Adding proxies to Jarvee is really simple, all you need to do is add them in this format: ipaddress:port. Followed by the username and password if you one. Once you've added, click verify proxy on the right-hand side to make sure they are working correctly. After you've added all of your profiles, you can go ahead and assign the proxies to a profile. You can also add your proxies to your accounts as you go along, during the set up of the social profiles there is an option to add your proxy details.
Adding Profiles
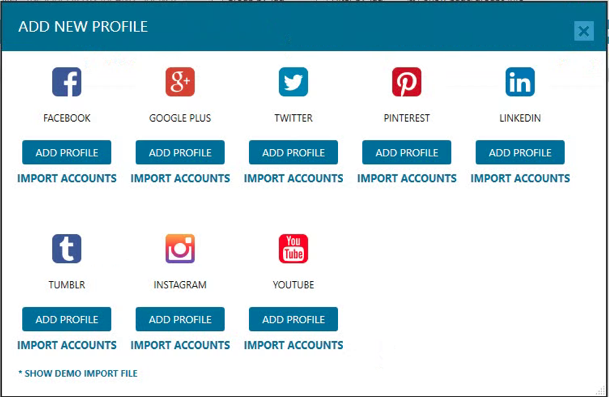
To add a social profile, click on the profile section on the left-hand side. From here if you click on the "add profile" button, you will see the screenshot above appear. As you can see Jarvee lets you automate a whole load of different platforms, each of which has their own individual settings. Once you add a profile you will see the following screen appear.
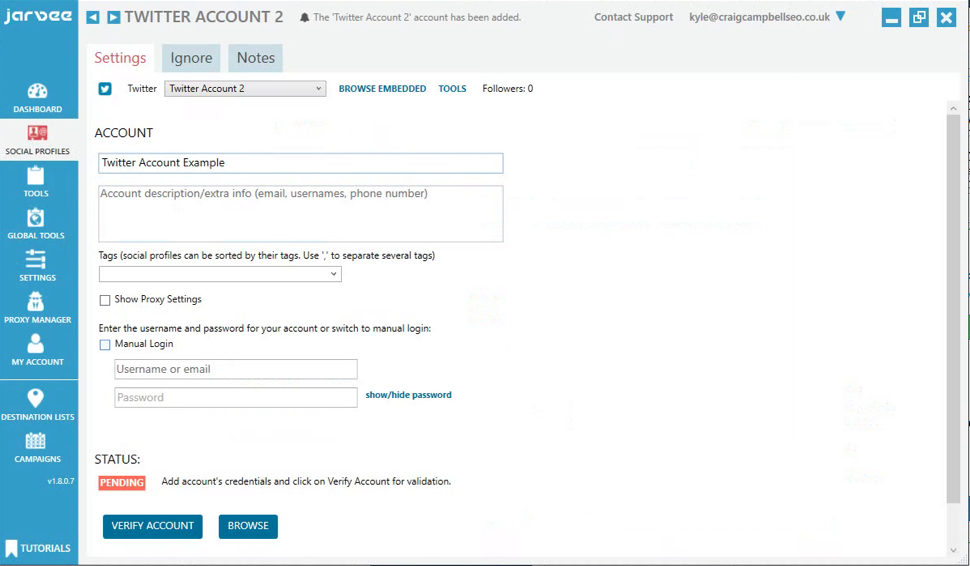
In this example, I am setting myself up a twitter account. The initial setup process is pretty straightforward, all you need to do is enter a few basic details:
- Name of your account (This doesn't need to be your accounts real name, it can be anything you'd like as it is just for the social profile section)
- A little description of your account (optional)
- Tags to help separate your profiles (optional)
- Clicking on the show proxy settings button lets you add in your proxies here instead of assigning the account later on. Again this is optional but I do urge you to use proxies as running all of your accounts using your own IP address can result in it getting banned.
- Your login details can be entered in two different ways, the first being that you can enter the username and password of the account in here and Jarvee will go ahead and login automatically for you. Once you've added that information if you click on the "verify account" button it should log Jarvee into your account. If it fails to log in successfully then I suggest using the "manual login" option. This will open a browser with Twitter open for you which you can login into there.
Now your account is set up it's time to check out the automation tools that Jarvee has to offer.
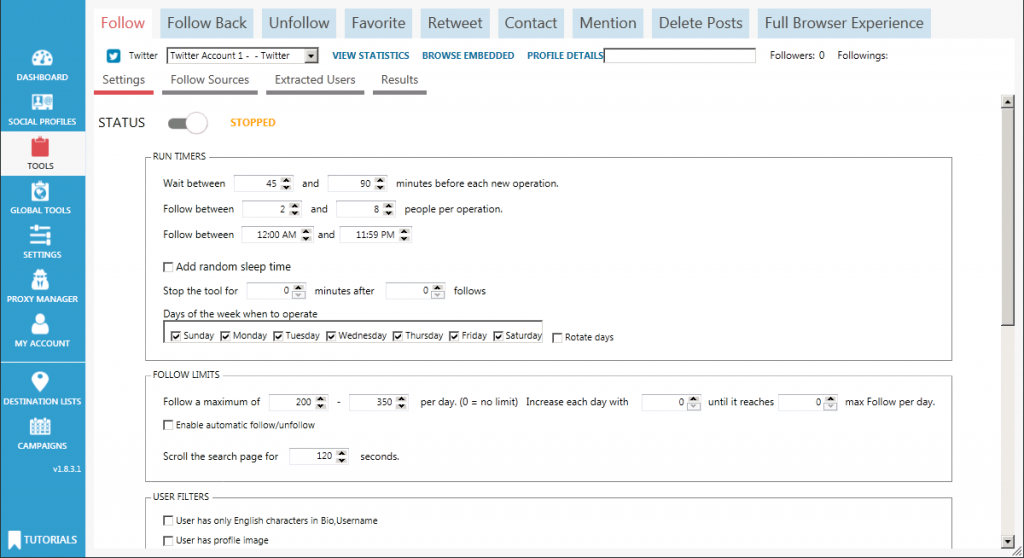 When I say this tool can automate everything on your social media, I really mean it. As you can see from the screenshot above there are loads and loads of different features available which you'll find in the navigation bar. The first one we'll start with is the "Follow" section. Here you can set your account to automatically start following people which will hopefully result in gaining some followers back.
Now, this won't start following random accounts that have no relevance to what you do. This tool can be set up very targeted making sure that all of the people you follow are genuine people that would be interested in what you have to say. Jarvee uses the term "operations" for the actions that the tool can perform. So if we take a look here you'll see that you can set the times at which Jarvee will run and how many people you want to follow within these timeframes. My advice here is always to try and make it seem as realistic and human-like as possible.
For example in this instance, I'd suggest keeping all of your settings at a relatively low amount and over time you can start increasing the number of people you follow etc. There is a lot you can play about with here such as setting limits and filters. You can set a limit on the number of people Jarvee will follow per day, along with the option to filter out certain profiles that don't have profile pictures etc. After these settings, the next area you want to go to is the "Follow Sources" page.
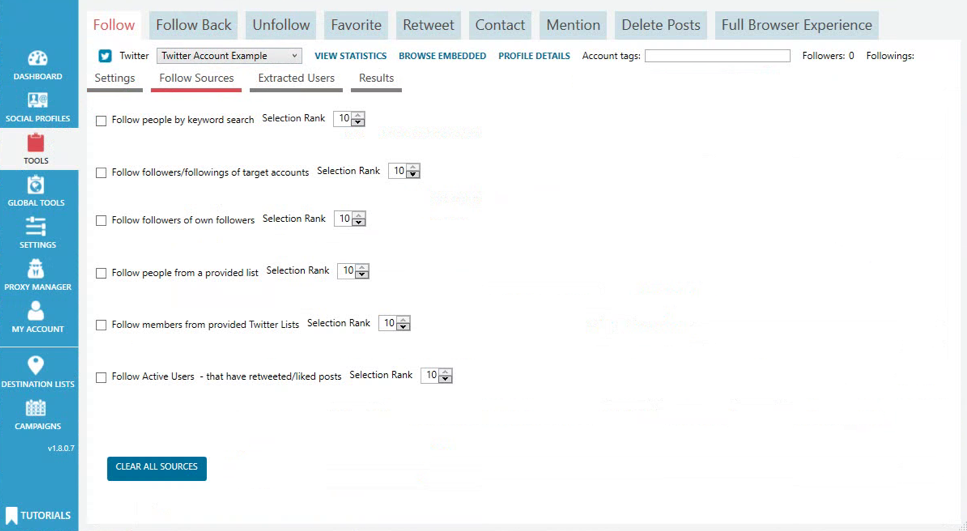
Here is where you decide what kind of accounts you are going to follow. The screenshot above is how the page itself looks, there are a few different methods that you can use to target who you follow. The ones that I'd recommend you use is the search by keyword and search by target accounts. The first kets you type in any keywords that you think is relevant to your account and Jarvee will search for people who have mentioned those keywords in their tweets and hashtags.
The next one is following the followers of any accounts you decide. You do this by pasting in the accounts URLs which Jarvee will then look through their followers individually following each one of them. This can be useful to target things like competitors twitter accounts etc as the chances are pretty high that they are interested in the same things that you have to offer. You will also notice there is something called "selection rank" for each of the methods with a number system from 1 to 10. This is all based on a level of priority, with 10 being the highest and 1 the lowest. You can really set this whichever way you'd like but I would suggest that you make those two I previously mentioned high priority as you can get some really good results from those resources.
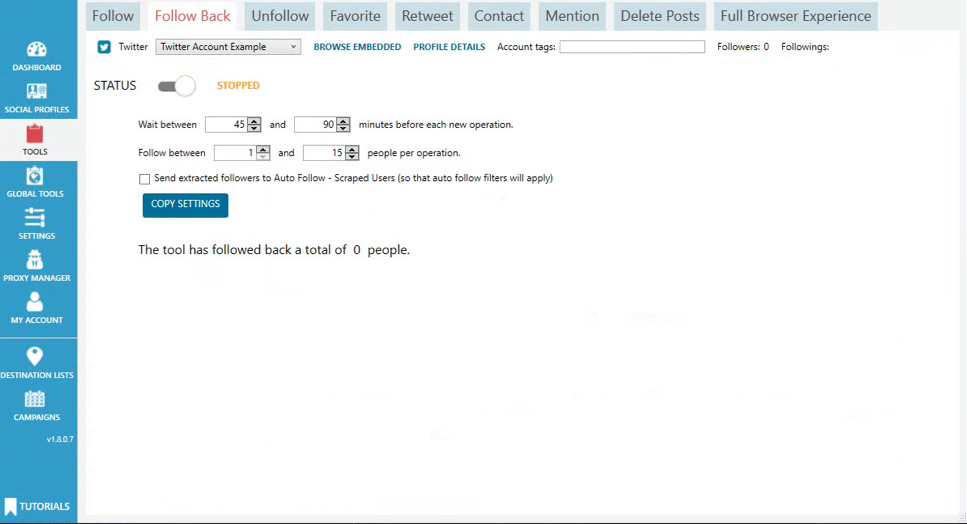
The next section on the list is the "Unfollow" button. Over time your account will have a large number of followings. Not all of these would have followed you back and you don't want to end up with a wildly skewed ratio. So what this will do is automatically start unfollowing people so that you can keep your numbers low. The other features that you can run on include, Favouriting tweets, Retweeting, contacting people, removing posts etc. All of this is just what you get when you set up a twitter account. If you try out any of the other social platforms, then there are loads more settings relative to whatever platform it is. The process for every account is the same:
- You select the social account
- Enter the account details
- Select your proxy
- Choose your automation settings
- Change status from "stopped" to "start
Summary
When push comes to shove Jarvee is pretty much an exact copy of massplanner. But massplanner happens to be an amazing tool which also makes Jarvee the same. Automating elements of your social media to build a following will save you so many hours of work that could be better spend on other parts of your business. If you are a freelance worker or work with only a small group of people then I would highly suggest giving this tool a try.
Agar Aapko ye Article pasand aaya to aap hamare YouTube Channel ko Subscribe kar sakte hai. Aap hame Twitter aur Facebook par bhi follow kar sakte hai
Post a Comment